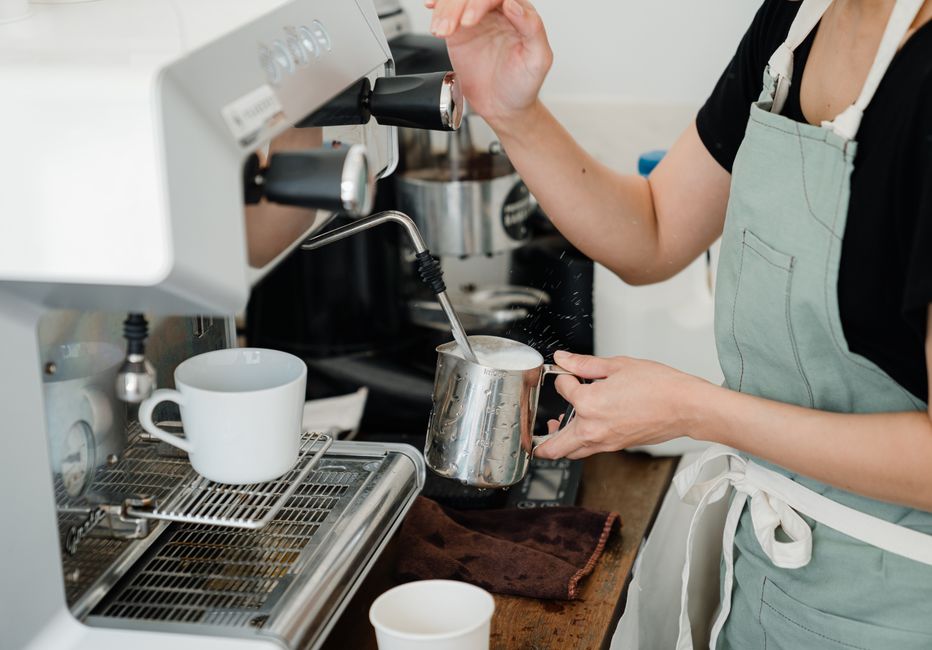
Frothed milk transforms ordinary coffee into something special. The microfoam adds a luxurious texture and helps balance the bold flavors of espresso. Plus, mastering these manual techniques gives you complete control over your foam consistency – something even expensive machines don't always guarantee.
The best part? You probably already have everything you need in your kitchen right now!
What Makes Good Milk Foam?
Before diving into the methods, let's understand what creates perfect foam. Good milk foam should be:
- Creamy and smooth with tiny, uniform bubbles
- Stable enough to hold its shape for several minutes
- Sweet and rich in flavor
- Glossy with a paint-like consistency
The key is incorporating air while heating the milk to create stable microfoam rather than large, soapy bubbles.
Best Milk Types for Frothing
Not all milk froths equally well. Here's what works best:
Whole milk (3.25% fat) is the gold standard. The fat content creates rich, stable foam that tastes amazing.
2% milk works well too, though the foam won't be quite as rich or stable.
Non-dairy alternatives like oat milk and soy milk can froth beautifully, while almond milk is trickier but possible.
Avoid skim milk if possible – it creates foam that's too airy and lacks richness.
Method 1: The Mason Jar Shake
What you need: Mason jar with tight lid, microwave
Time: 2-3 minutes
Difficulty: Beginner
This is hands-down the most popular manual frothing method, and for good reason – it works!
Steps:
1. Fill a mason jar halfway with cold milk (about 1/2 cup)
2. Screw the lid on tightly
3. Shake vigorously for 30-60 seconds until the milk doubles in volume
4. Remove the lid and microwave for 30 seconds
5. The foam will rise to the top while heated milk settles below
6. Spoon the foam onto your coffee and pour the warm milk
Pro tip: The microwave step is crucial – it stabilizes the foam and heats the milk simultaneously.
What you need: French press, stovetop or microwave
Time: 3-4 minutes
Difficulty: Beginner
Your French press isn't just for coffee! The plunger mechanism makes it perfect for creating foam.
Steps:
1. Pour cold milk into the French press (fill about 1/3 full)
2. Place the lid on with the plunger pulled all the way up
3. Pump the plunger up and down rapidly for 30-60 seconds
4. Remove the lid and heat the milk in microwave for 30 seconds, or transfer to a saucepan and heat gently
5. Pour the warm milk and spoon the foam onto your coffee
Why it works: The mesh filter creates perfect agitation while containing the milk, resulting in consistent microfoam.
Method 3: Whisk Power Method
What you need: Balloon whisk, small saucepan
Time: 4-5 minutes
Difficulty: Intermediate (requires arm strength!)
This traditional method gives you complete control over the process.
Steps:
1. Heat milk in a small saucepan over medium heat until steaming (don't boil)
2. Remove from heat
3. Whisk vigorously in a circular motion for 1-2 minutes
4. The milk should become frothy and increase in volume
5. Pour immediately into your coffee
Technique tip: Use quick, circular motions and keep the whisk moving to incorporate maximum air.
Method 4: The Pump Frothing Method
What you need: Large measuring cup, small saucepan, ladle
Time: 3-4 minutes
Difficulty: Intermediate
This technique mimics the action of a manual milk frother.
Steps:
1. Heat milk in a saucepan until steaming
2. Pour into a large measuring cup
3. Insert a ladle and pump it up and down rapidly, creating a plunging motion
4. Continue for 30-60 seconds until foam forms
5. Let settle for 30 seconds, then pour
Key point: The pumping action should be quick and consistent to create stable foam.
Method 5: The Immersion Blender Hack
What you need: Immersion blender, tall container, stovetop
Time: 2-3 minutes
Difficulty: Beginner
If you have an immersion blender, this method produces excellent results quickly.
Steps:
1. Heat milk in a saucepan until steaming
2. Pour into a tall, narrow container
3. Insert the immersion blender and blend on high for 10-15 seconds
4. Move the blender up and down to incorporate air
5. Pour immediately
Safety note: Be careful with hot milk and electrical appliances – keep the blender head fully submerged.
Method 6: The Traditional Milk Pan Method
What you need: Heavy-bottomed saucepan, wooden spoon
Time: 5-6 minutes
Difficulty: Advanced
This old-school method requires patience but produces beautiful results.
Steps:
1. Pour milk into a heavy-bottomed saucepan
2. Heat over medium-low heat, stirring constantly
3. As milk warms, stir more vigorously in figure-8 patterns
4. Continue stirring as the milk begins to foam naturally
5. Remove from heat when desired foam level is reached
6. Pour immediately
Mastery tip: This method takes practice to perfect the timing and stirring technique.
Pro Tips for Perfect Foam Every Time
Temperature Matters
- Cold milk froths better than room temperature milk
- Optimal serving temperature is 150-160°F (65-70°C)
- Never boil the milk – it breaks down proteins needed for stable foam
Timing is Everything
- Use foam immediately – it starts deflating within minutes
- Don't over-froth – 30-60 seconds of agitation is usually enough
- Let foam settle for 30 seconds before pouring to separate from liquid milk
Equipment Care
- Clean everything thoroughly – residue prevents proper foam formation
- Use the right proportions – never fill containers more than halfway with milk
Troubleshooting Common Problems
Foam deflates quickly? Your milk might be too hot, or you need to froth longer.
Large bubbles instead of microfoam? Slow down your technique and ensure equipment is clean.
Not enough foam? Use colder milk and make sure you're incorporating enough air.
Foam tastes bland? Try whole milk or add a pinch of sugar before frothing.
Taking Your Coffee Game Further
Once you've mastered manual frothing, you might want to explore upgrading your coffee setup. For consistently excellent coffee beans delivered to your door, check out Trade Coffee's subscription service – they'll match you with beans from top roasters nationwide.
If you're ready to invest in proper equipment, Fellow makes exceptional manual coffee gear that bridges the gap between basic tools and expensive machines. And for any additional accessories or ingredients, Amazon has everything you need to build your perfect home coffee station.
The Joy of Manual Milk Frothing
Mastering these manual frothing techniques connects you to the craft of coffee making in a way that push-button machines simply can't. There's something deeply satisfying about creating perfect foam with nothing but basic tools and technique.
Plus, these skills make you coffee-shop independent! Whether you're camping, traveling, or simply want to impress friends with your barista skills, you'll always be able to create café-quality drinks.
Final Thoughts
Learning how to froth milk without a machine opens up a world of coffee possibilities right in your own kitchen. Whether you prefer the simplicity of the mason jar method or want to master the traditional whisk technique, each approach offers its own rewards.
Start with the mason jar method – it's foolproof and requires minimal effort. As you get comfortable, experiment with the other techniques to find your favorite. Remember, like any skill, manual milk frothing improves with practice.
Soon you'll be creating beautiful lattes, cappuccinos, and other milk-based drinks that rival your favorite coffee shop. And the best part? You'll have developed a valuable skill that will serve you well whether you ever invest in fancy equipment or not.
Now grab that mason jar and start shaking – your perfect homemade latte awaits!